Previous

Downloading and Verifying the Bitstream

After the cable is connected to your computer, you can download the bitstream. If you are using an XChecker cable, you can also verify the design. You will use the Hardware Debugger tool to perform design download and verification.
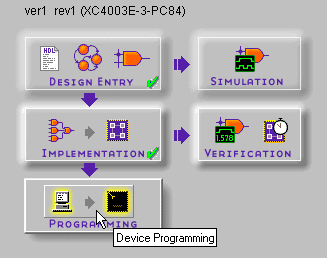
  1. To invoke the Hardware Debugger, click the Programming phase button in the Flow tab of the Foundation Project Manager.

    figures/program_flow.gif

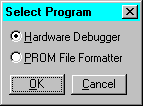
  2. When the Select Program dialog box opens, select Hardware Debugger and click OK.

    figures/selprog.gif

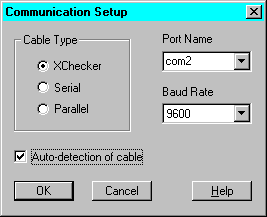
    The Communications dialog box opens.

    figures/comsetup.gif

  3. Click a cable type in the Cable Type field. Select the auto detect option or the correct port from the port drop-down list box and the appropriate baud rate from the Baud Rate drop-down list box. Click OK.

    After you have used a certain kind of cable and set the correct port, the information is saved in a file called design_name.xck in your design directory, so you do not have to specify it each time.

  4. Select Download Download Design or click the following toolbar button.

    figures/bdnld.gif

    If you are using an XChecker cable, select Download Download and Verify or click the following toolbar button if you want to verify the design. You must also connect the RT and RD pins for readback to be available.

    figures/bdnldver.gif

    If the FPGA is successfully configured, the following message appears.

    Figure 9.6 Pop-up Message Box

    If the DONE signal does not go High, check the connections between the cable and the demonstration board, power the board off and on, and try downloading again. Also, ensure that the bitstream is targeted for an XC4003E device.

    If the Hardware Debugger informs you in a message that the current design does not include the READBACK block connected, check your schematic to ensure that the DEBUG_CKT symbol is connected as shown in the “DEBUG_CKT Symbol Connections” figure.


    NOTE

    The serial download cable has limited functionality when used with XC4000 family parts and may report that DONE went High even if you do not press the PROG button as in Step 6. If this occurs, the part is not re-configured. Download the bitstream again, this time pressing the PROG button prior to configuration. Cycling the power off and on before starting the download has the same effect.


    If you chose the Download and Verify command, the software initiates a design verification after downloading. The output of the design verification is displayed in a message box.

Figure 9.7 Pop-up Message Box

Next