In this hierarchical design, you will create various types of macros, including schematic-based macros, HDL-based macros, state machine macros, and LogiBLOX macros. You will learn the process for creating each of these types of macros, and then you will connect them all together to create the completed Watch design. This tutorial gives you experience with creating and using each type of design macro so that you can apply this knowledge to your own design.
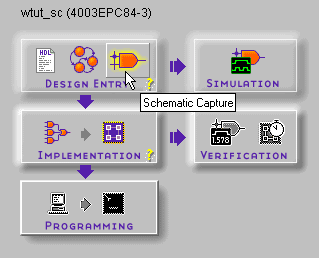
There are two different ways to open the Schematic Capture tool.
The Schematic Editor opens with the Watch schematic sheet loaded. The Watch schematic is incomplete at this point. Throughout the tutorial, you create the components to complete the design. The unfinished design is shown in the figure below.
Figure 4.4 Incomplete Watch Schematic |
If you need to stop the tutorial at any time, save your work by selecting File ![]() Save from the pulldown menus.
Save from the pulldown menus.
There are three ways to execute commands within the Foundation tools: pulldown menus, hotkeys, and toolbar buttons. In most cases, this tutorial instructs you to use the pulldown menus.
You can use the keyboard to execute various commands. These “hotkeys” are listed next to the commands within the pulldown menus. Some of the hotkeys are the function keys, some are single letters, and some require the Ctrl or Alt keys. You cannot customize them.
There are also toolbars that are located beneath the pulldown menus and to the left of the main Schematic Editor window. Hold your mouse over the buttons to see their function.
Figure 4.5 Schematic Editor |
Under the Display pulldown menu is a series of commands that modify the viewing area of the Schematic Editor window. Zoom in the schematic to comfortably view it.
A schematic-based macro consists of a symbol and an underlying schematic. You can create either the underlying schematic or the symbol first, and the tools can automatically generate the corresponding symbol or schematic file, respectively. In the following steps, you create a schematic-based macro by first creating the symbol using the Symbol Wizard. A template schematic file is then created by the tools, and you complete the schematic with the appropriate logic. The created macro is then automatically added to the project's library.
The macro you will create is called CNT60. CNT60 is a binary counter with two 4-bit outputs, which represent the Ones and Tens values of the stopwatch. The counter counts from 0 to 59, decimal.
Figure 4.6 Symbol Wizard - Contents Page |
Figure 4.7 Symbol Wizard - Ports Page |
In the Comments section, you can type text that appears on the symbol when it is placed. You can also define a longer comment that only appears in the SC Symbols window when you place components.
If the schematic is not automatically created, the most likely cause is that Empty was selected in step 4. Repeat steps 1-9, and click Yes or OK when prompted to overwrite the existing symbol.
You have now created the symbol for CNT60 with the help of the Symbol Wizard. The next step is to create the underlying corresponding schematic for this macro. You can then reference this macro symbol by placing it on a schematic sheet.
Figure 4.8 CNT60 Schematic Hierarchy Connectors |
Hierarchy Connectors logically connect the CNT60 symbol and its underlying schematic. The name of each pin on the symbol must have a corresponding connector in the underlying schematic.
The Symbol Wizard automatically places hierarchy connectors on the schematic. If you need to add hierarchy connectors manually, you can use the Hierarchy Connector icon in the vertical toolbar.
![]()
When you save a macro, the Schematic Editor checks the hierarchy connectors against the corresponding symbol. If there is a discrepancy, you can let the software update the symbol automatically, or you can modify the symbol manually. Hierarchy connectors should only be used to connect signals between levels of hierarchy. Never use hierarchy connectors on top-level schematic sheets.
When you create a new project in Foundation, three libraries are automatically added to the project: the appropriate device family library based on the target family you have chosen (for example, xc4000e), the project library (with the same name as the project), and the SIMPRIMS library (for simulation). All libraries which are part of the project are listed in the Files tab of the Project Manager. You can double click on any of these libraries to see the contents of the library.
Figure 4.9 Project Libraries |
The device family library (XC4000E for this project) contains all of the Xilinx Unified Library components for the given family. A complete description of all of these components can be found in the DynaText Xilinx Libraries Guide.
The project library (WTUT_SC for this project) is a writable library containing user-created macros. Any macro you create in this project is automatically placed in this library.
Additionally, you can copy macros from other libraries into this project library and vice versa using the Schematic Symbols Library Manager which you can open with the Tools ![]() Utilities menu in the Project Manager.
Utilities menu in the Project Manager.
To facilitate simulation with the Foundation Logic Simulator, the SIMPRIMS is added to the project. This library contains the simulation models for the Xilinx devices.
You can add more libraries to the project by choosing File ![]() Project Libraries from the Project Manager. After you add a library to the project, you can use any component from that library in the current project.
Project Libraries from the Project Manager. After you add a library to the project, you can use any component from that library in the current project.
Components from all of the libraries (except SIMPRIMS) for the given project are available from the SC Symbols toolbox to place on the schematic. The available components listed in this toolbox are arranged alphabetically within each library.
Figure 4.10 SC Symbols Toolbox |
Figure 4.11 Completed CNT60 Schematic |
The preceding schematic illustrates the completed CNT schematic. Use this figure as a reference for drawing nets and buses in the following subsections.
If you make a mistake when placing a component, you can easily move or delete the component.
Follow the steps listed previously in the “Adding Components to CNT60” section to place the CD4CE, OR2, CB4RE, INV, and AND4 components on the schematic sheet as shown in the “Completed CNT60 Schematic” figure. For a detailed description of the functionality of each of these components, refer to the Xilinx Libraries Guide.
To make the schematic easier to draw and clearer to read, move some of the hierarchy connectors which were automatically created by the Symbol Wizard. Follow these steps to relocate the hierarchy connectors as shown in the “Completed CNT60 Schematic” figure.
You use the Draw Wires icon in the vertical toolbar to draw wires (also called nets) between the various components on the schematic. Use Nets to physically connect single bits together.
Signals can also logically be connected by naming multiple segments identically. In this case, the nets do not need to be physically connected on the schematic to make the logical connection. In the CNT60 schematic, you will draw nets to connect the components together. Do not yet worry about drawing the nets for the LSBSEC and MSBSEC buses. These nets will be drawn in the next section.
Follow these steps to draw a net between the AND2 and the CB4RE components on the CNT60 schematic.
You can specify the shape of the net by moving the mouse in the direction you want to draw the net and then single-clicking to create a 90-degree bend in the wire.
Draw the nets to connect the remaining components as shown in the “Completed CNT60 Schematic” figure. To draw a net between an already existing net and a pin, click once on the component pin and once on the existing net. A junction point will be drawn on the existing net.
You should now have all the nets drawn except those connected to the LSBSEC and MSBSEC buses. You will draw these in the next section.
Sometimes it is convenient to draw a set of signals as a bus rather than as several separate wires. You have the option to group signals in the form of a bus and “tap” this bus off to use each signal individually. In this CNT60 schematic, you will create two buses, each comprised of the 4 output bits of each counter. These buses will be named LSBSEC[3:0] and MSBSEC[3:0], and they will also be connected to hierarchy connectors to connect them to the CNT60 symbol.
Add buses to the schematic as follows.
Figure 4.12 Creating Bus Ends |
Next, you add nets to attach the appropriate pins from the CB4RE and CD4CE counters to the buses. Use Bus Taps to tap off a single bit of a bus and connect it to another component. The Schematic Capture tool can automatically name the bus taps incrementally as they are drawn.
You have the option to enlarge the view of the schematic to make it easier to draw the nets.
The default is to start at 3 and decrement as bus taps are drawn. You can use the up and down arrow keys to change which bus bit will be tapped first.
If the bits are not automatically being labeled incrementally, check that you clicked the bus name (label) before clicking the counter output pins.
If the nets appear disconnected, try selecting Display ![]() Redraw to refresh the screen.
Redraw to refresh the screen.
The CNT60 schematic is now complete.
Save the schematic by selecting File ![]() Save or clicking the Save icon in the horizontal toolbar.
Save or clicking the Save icon in the horizontal toolbar.

All errors, warnings, and informational messages are displayed in the Message Window in the Project Manager. If any errors are issued, resolve them and save the schematic again.
So far, you have created the CNT60 macro. The next step is to place this macro on the top-level Watch schematic sheet, where it may then be connected to other components in the design.
Figure 4.13 Placing the CNT60 Macro |
LogiBLOX is a graphical interactive design tool that you use to create high-level modules such as counters, shift registers, RAM, and multiplexers. You can customize and pre-optimize the modules to take advantage of the inherent architectural features of the Xilinx FPGA architectures, such as Fast Carry Logic for arithmetic functions and on-chip RAM for dual-port and synchronous RAM.
In this design, you create a LogiBLOX module called Tenths. Tenths is a 10-bit one-hot encoded counter. It counts the tenths digit of the stopwatch's time value. To better see the digit when it is downloaded on the FPGA Demonstration Board, the encoding is set to one-hot. The series of LED lights displays the Tenths digit, where one light is on for each count of the tenths digit.
You use the LogiBLOX Module Selector GUI to select the type of module you want to create, as well as the specific features of the module. You may invoke this GUI from either the Project Manager, the Schematic Editor, or the HDL Editor. The operation of the tool is the same regardless of where you invoke it.
Figure 4.14 LogiBLOX Module Selector |
If you do not want to place the symbol at this time, you can press the Esc key on the keyboard to get out of the Place Symbol mode. You can then select it at any time from the SC Symbols Toolbox to place on the schematic.
Figure 4.15 Placing the Logiblox TENTHS component |
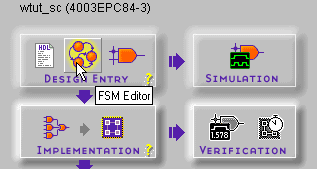
With the Foundation State Editor, you graphically create finite state machines. You draw states, inputs/outputs, and state transition conditions on the diagram using a simple windows GUI. Transition conditions and state actions are typed into the diagram in appropriate VHDL, Verilog, or ABEL syntax. The State Editor then synthesizes the diagram into either VHDL, Verilog or ABEL code. The resulting HDL file is finally synthesized to create a netlist and/or macro for you to place on a schematic sheet.
For this tutorial, a partially complete state machine diagram is provided. In the next section, you complete the diagram and synthesize the module into a macro to place on the Watch schematic. Both a VHDL and an ABEL version of the State Machine diagram have been provided for you.
If you have a Foundation Express package, you can use either the VHDL or ABEL version. If you have a Foundation Standard or a Foundation Base package, then you must use the ABEL version of the diagram.
To invoke the State Editor, click the State Editor button in the Flow tab of the Project Manager.
A dialog box prompts you to select a document. Click Existing Document, click OK, and then select STMACH_V.ASF (VHDL) or STMACH_A.ASF (ABEL) to open the partially completed stopwatch state machine.
The unfinished State Machine diagram is shown below.
Figure 4.16 Incomplete State Machine Diagram |
In the State Machine diagrams, the transition conditions and the state actions are written in proper HDL syntax, either VHDL or ABEL.
In the following section, you add the remaining states, transitions, actions, and also a reset condition to complete the state machine.
Complete the state machine by adding a new state called CLEAR.
Figure 4.17 Adding the CLEAR State |
You can change the shape of the state bubble by clicking the bubble and dragging in the direction to “stretch” the bubble.
A transition defines the movement between states of the state machine. Transitions are represented by arrows in the State Editor. You will be adding a transition from the CLEAR state to the ZERO state in the following steps. Because this transition is unconditional, there is no Transition Condition associated with it.
Figure 4.18 Adding State Transition |
A State Action dictates how the outputs should behave in a given state. There are three types of state actions: Entry Action, State Action, and Exit Action. These determine if the outputs should act upon entry to, existence in, or exit from a given state, respectively.
You will add two state actions to the CLEAR state, one to drive the CLKOUT output to 0, and one to drive the RST output to 1.
Figure 4.19 Adding State Actions |
Using the State Machine Reset, you specify a reset condition for the State Machine. The state machine initializes to this specified state and enters the specified state whenever the reset condition is met. In this design, you add a Reset condition which sends the state machine to the CLEAR state whenever the RESET signal is asserted.
Figure 4.20 Adding Reset |
Add the Transition Condition to the Reset. Transition Conditions are applied to all transitions, not only Reset transitions, in the same way. Transition Conditions are attached to the transition arrows, and describe the required condition for the movement between states.
Add a transition condition which tells the state machine to reset to the CLEAR state whenever the signal RESET is high.
Figure 4.21 Adding Reset Transition Condition |
You will now synthesize the state machine and a macro will be created that you can place on the Watch schematic. The macro symbol will automatically be added to the project library. The synthesis process encompasses the creation of the HDL code from the state machine diagram and the synthesis of the HDL code by either the Foundation Express (VHDL) or XABEL (ABEL) compiler. Additionally, you have the option to use the State Editor to create a symbol for the state machine which you can place on the schematic.
You can now place the STMACH state machine macro on the Watch schematic. If it is not already opened, open the Schematic Editor. Open the SC Symbols Toolbox to view the list of available library components. You should now be able to locate the STMACH_A or STMACH_V macro in this list. (If the SC Symbols Toolbox was already open, and you do not see the STMACH macro, select File ![]() Update Libraries.) Select the appropriate symbol, and add it to the Watch schematic as shown below. Do not worry about drawing the wires to connect this symbol. You will connect the entire schematic later in the tutorial.
Update Libraries.) Select the appropriate symbol, and add it to the Watch schematic as shown below. Do not worry about drawing the wires to connect this symbol. You will connect the entire schematic later in the tutorial.
Figure 4.22 Placing the State Machine Macro |
Save the schematic.
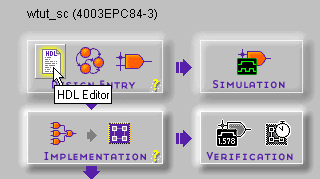
With Foundation you can create modules from HDL code. The HDL code is synthesized by either the Express compiler (for VHDL or Verilog), or the XABEL compiler (for ABEL), and a symbol is generated which you can place on the schematic.
If you use Verilog or VHDL to create an HDL macro, then you must have Base Express or Foundation Express and a valid license.
You will create an HDL module from scratch. This macro serves to convert the two 4-bit outputs of the CNT60 module into 7-segment LED display format.
The HDL Wizard is very similar to the Symbol Wizard that you used to create the CNT60 macro earlier.You enter the name and ports of the component and the HDL Wizard creates a “skeleton” HDL file which you can complete with the remainder of your code.
You must have a Base Express or Foundation Express package in order to use VHDL or Verilog.
Figure 4.23 HDL Wizard |
Figure 4.24 Skeleton HDL File |
In the HDL Editor, the ports are already declared in the HDL file, and some of the basic file structure is already in place. Keywords are printed in red, comments in green, and values are gray. This color-coding enhances readability and recognition of typographical errors.
Use the templates from the Language Assistant for commonly used HDL constructs, as well as synthesis templates for commonly used logic components such as counters, D flip-flops, multiplexers, and global buffers. You can add your own templates to the Language Assistant for components or constructs you use often.
Figure 4.25 HDL Language Assistant |
Synthesize the code and create a macro symbol which may be placed on the schematic.
You are now ready to place the HEX2LED macro on the Watch schematic. Open the Schematic Editor if it is not already open. Open the SC Symbols Toolbox (refer to the “Adding Components to CNT60” section) to view the list of available library components. You should now be able to locate the HEX2LED macro in this list. Select it, and add it to the Watch schematic as shown below.
This component will be placed on the Watch schematic sheet in two separate instances. To duplicate the component in the schematic, click the left mouse button while the pointer is on the placed symbol, and then click again to place the duplicate symbol.
The Symbols Toolbox icon must still be depressed on the vertical toolbar to enable this feature to automatically duplicate a symbol.
Again, do not worry about drawing the wires and buses to connect this macro. You will connect the entire schematic later in the tutorial.
Figure 4.26 Placing the HEX2LED Component |
When specifying device I/O on a schematic sheet, use components from the Xilinx Unified Library to represent the input/output pads and buffers in the device. The XC4000E library, which is attached to this Foundation project, contains primitive components for these, such as IPAD, OPAD, IBUF, OBUF, and IOPAD. You can place I/O components on any level of hierarchy in a Foundation schematic. However, it is recommended that the pad and the buffer (that is, IPAD/IBUF) reside on the same level of hierarchy. In other words, do not split up the pad and the buffer between levels of hierarchy.
Descend into a lower-level of hierarchy to view the underlying file. You will be pushing down into the OUTS1 macro, which is a schematic-based user-created macro.
Figure 4.27 OUTS1 Schematic Macro |
Add two more input pins to the Watch schematic, called RESET and STRTSTOP.
Figure 4.28 Placing RESET and STRTSTOP I/O Components |
It is important to label nets and buses for several reasons. It aids in debugging and simulation, as you will more easily trace nets back to your original design. Any nets which remain unnamed in the design will be given machine-generated names which will mean nothing to you later in the implementation process. Naming nets also enhances readability and aids in documenting your design.
Label the two input nets you just drew. When naming input and output pins, it is advisable to label the net between the pad and the buffer. This name is carried through the entire design flow including place and route. If you label only the output of the buffer (in the case of an input pin) or input of the buffer (in the case of an output pin), you will not be able to easily trace your I/O pins in implementation tools and reports.
Figure 4.29 Labeling Nets |
Figure 4.30 Labeled Nets |
Xilinx recommends that you let the automatic placement and routing program, PAR, define the pinout of your design. Pre-assigning locations to the pins can sometimes degrade the performance of the place and route tools. However, it is usually necessary, at some point, to lock the pinout of a design so that it can be integrated into a PCB (Printed Circuit Board).
Define the initial pinout by running the place-and-route tools without pin assignments, then locking down the pin placement so that it reflects the locations chosen by the tools. In this design, you assign locations to the pins in the Watch design so that the design can function in a Xilinx demonstration board. Because the design is simple and timing is not critical, these pin assignments will not adversely affect the ability of PAR to place and route the design.
Specify pin locations by attaching a LOC parameter to a pad component. Assign a LOC parameter to the pad associated with the RESET signal on the Watch schematic as follows.
Figure 4.31 Assigning Pin Locations |
You may click and drag the attributes to position them where you wish on the schematic.
Figure 4.32 STRTSTP Pin Assignment |
The XC4000 devices contain an on-chip oscillator which may be used to generate internal clock signals. To access the internal oscillator, place the OSC4 component from the XC4000 Unified Library on your schematic. Nominal clock frequencies of 8MHz, 500kHz, 16kHz, 490Hz, and 15Hz are available, and are specified by corresponding output pins of the OSC4 symbol. In the Watch design you use the 15Hz clock output of the OSC4 component as the system clock in the design. The frequency of these clock signals is not precise. Do not use the OSC4 when you require a high degree of clock speed precision.
From the SC Symbols list, locate the OSC4 component in the XC4000E library and place this component on the schematic as shown below.
Figure 4.33 Placing the OSC4 |
All Xilinx devices contain a set of Global Buffers which provide low-skew distribution of high fanout signals. The number and type of global buffers differ depending on the Xilinx device family you target. Consult the Xilinx Libraries Guide for more information regarding the various types of global buffers available.
In the Watch design, you will use a BUFG component from the XC4000E library to drive the clock signal from the OSC4. The signal on the output of the BUFG is the buffered clock signal which will drive all the clocks in the system.
Figure 4.34 Placing the BUFG |
This section describes the necessary preparations you must make in the design entry phase of the design flow in order to do in-circuit hardware debugging after implementation.
The last tutorial chapter of this manual is called the “In-Depth Tutorial - Hardware Verification” chapter. In this chapter, you have the option to both download the design to the Xilinx Demonstration Board and also perform on-chip hardware debugging using the Hardware Debugger tool.
In order to perform hardware debugging, place the READBACK symbol in your design, and provide access to an external clock source in order to perform the synchronous debugging. In the Watch design, a schematic-based macro called DEBUG_CKT is provided in the project library which contains the necessary circuitry to perform hardware debugging later in this tutorial.
If you wish to complete the hardware debugging chapter later, place the DEBUG_CKT on the Watch schematic as shown below. Disconnect the CLK net that you just drew in order to place the DEBUG_CKT in the design. To delete the CLK net, select it, then press the Del key on your keyboard. Label the new CLK net that you draw.
If you only want to download the design to the Demo Board and do not want to perform in-circuit hardware debugging, then it is not necessary to use this DEBUG_CKT macro, and you can leave the schematic as is.
Figure 4.35 Placing the DEBUG_CKT Macro |
Complete the schematic by wiring the components you have created and placed, adding any additional necessary logic, and labeling nets appropriately. The following steps guide you through the process of completing the schematic, or you may want to use the completed schematic shown below for guidance. Each of the actions in this section has been discussed in detail in earlier sections of the tutorial. If you need to review these sections, you may return to them. The finished schematic is shown in the following figure as a guide.
Figure 4.36 Completed Watch Schematic |
Remember that nets are logically connected if their names are the same, even if the net is not physically drawn as a connection in the schematic. This method is used to make the logical connection of the RST_INT, CLKEN_INT and CLK_INT signals.