


Device Programming - Downloading Your Design File
The following tutorial shows how to program an XC9500XL device by using the Xilinx JTAG Parallel Download Cable.
Note: Though this procedure uses the jc2_abl design as an example, any design can be downloaded using the procedure described here.
The Xilinx part number for the JTAG
Parallel Download Cable is: HW-JTAG-PC1
1. Connect the Xilinx JTAG Parallel Download Cable to your PC. Then connect the cable to your target device JTAG pins as specified in the device data sheet (and turn on the power to your target device).
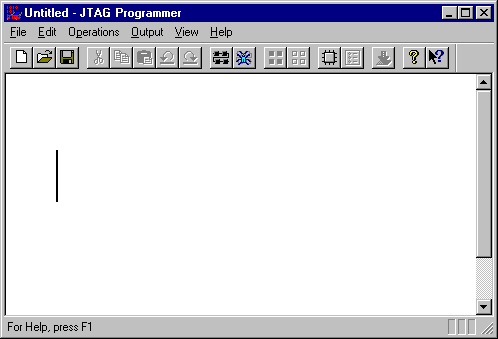
2. After you have successfully implemented your design and connected a JTAG cable, select the JTAG Programmer by choosing Device Programming from the WebPACK program group. You will see the following screen:
You can also highlight the JTAG Programmer process in the Project Navigator window and select Process - Run. This will bring you directly to step 6.
3. The JTAG Programmmer can auto-detect your target device. Select File - Initialize Chain. The chain is detected and the part displays as shown below.

4. Now attach the jc2_abl.jed file to the device. Highlight the device and select Edit - Properties. The device properties dialog box appears.
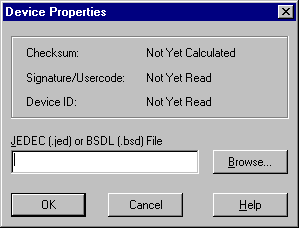
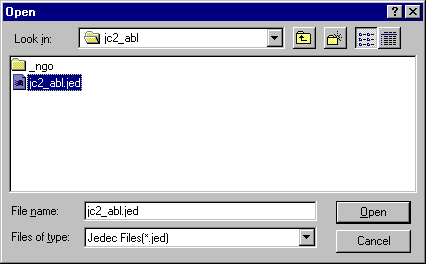
5. Click the Browse key and select the jc2_abl.jed file by highlighting the file with the mouse and clicking Open.
The Device Properties dialog box will reappear. Click OK.
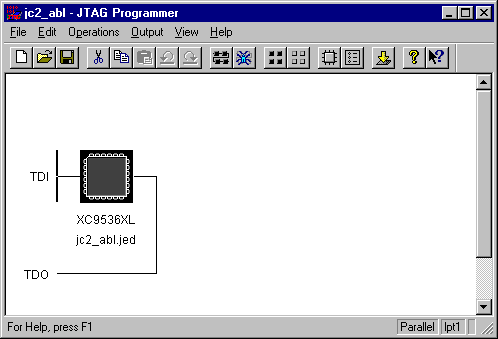
6. The JTAG Programmer will show the jc2_abl.jed file.
7. Start the JTAG programming
operation by selecting Operations ![]() Program
from the JTAG Programmer menu:
Program
from the JTAG Programmer menu:
You will see the following screen:
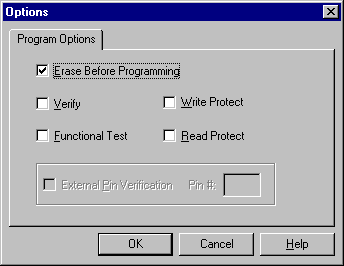
8. Select Erase Before Programming
and Verify, then click  .
.
When programming is complete an Operations Display will appear and inform you of the results.